Vim Customization: Guide to writing your own VIMRC
Vim is all about customization. It comes from a long line of ancestors starting from ed (1971), ex (1976), vi (1979), and finally VIM (1991).
Vim is designed with the philosophy of speed and minimal keystrokes. But I guess, if you're on this page, you already know that.
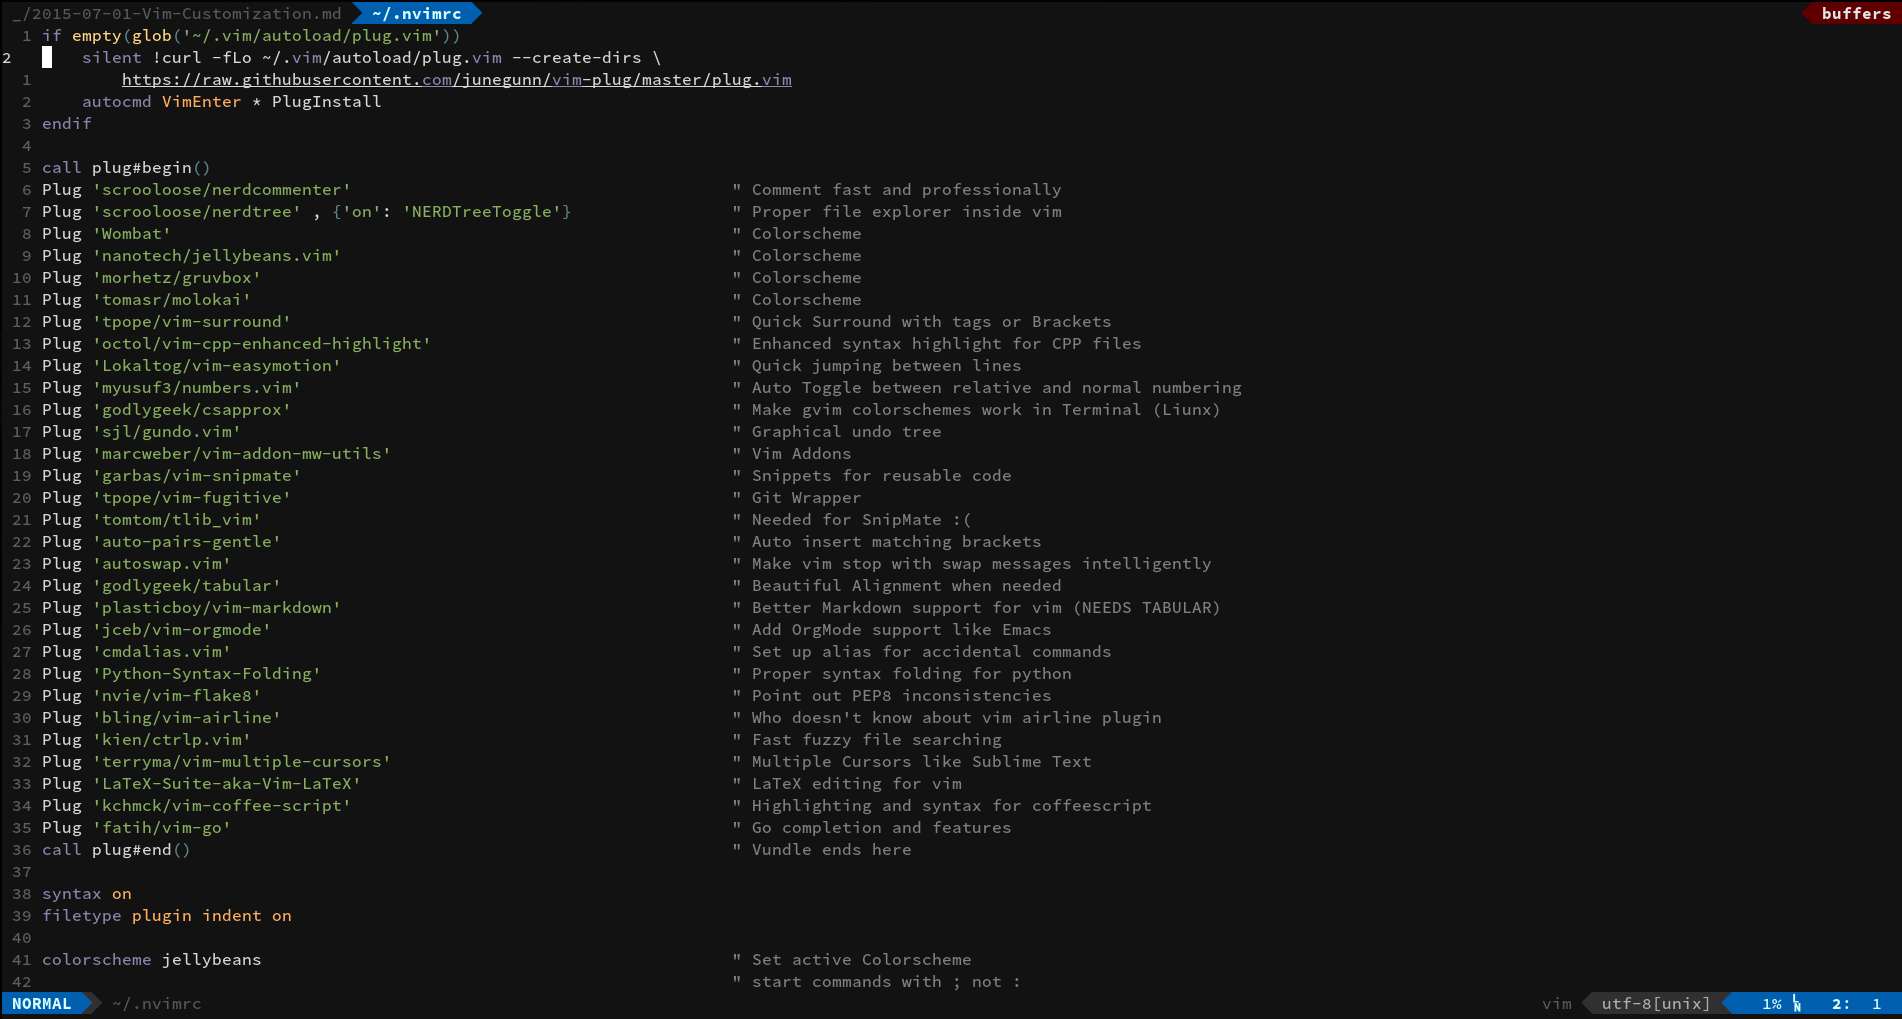
The screenshot in above banner is how my vim looks currently. (In case you can't see it, click here) If you'd notice, there's a bar on the top showing the buffers I have currently open, the bottom bar shows the mode, character encoding, github branch (when I'm inside a project). The code is color highlighted, the indentation happens automatically based on the language of the program, brackets match themselves, it offers syntax completion, word completion, and even points out errors in my programs. All in all, it is pretty much everything you can ever want from a text editor.
Note that it is still running inside my terminal. I am NOT running gvim. All of vim (even inside a console) can be tweaked and configured to your liking.
Unfortunately, none of these customizations are on by default. When you open vim for the first time, it looks somewhat like this:

Sadly, this is also the reason, many users don't try it out. I mean who would guess that this is the same editor as the one shown on the top.
Anyway, we will see how to customize your vim, so that it doesn't just look like a premium text editor, but functions better than one too.
The rest of the post is split into multiple Tips and Posts, each acting to explain a specific section of the vimrc.
For any good vimrc, package management is a must. You have multiple options to choose from, including vim-plug, vundle, neobundle, pathogen etc. Follow the link to get a quick rundown.
Your vim colorscheme defines you. Whether you like a dark background or light, whether you like comments to be emphasised or dulled down. I cover some of my personal favorites in this post.
This is where vim - specific awesomeness starts. You can (literally) ask your editor to do what you want with the keys that YOU want. I've covered the basic ways of making vim keybindings in the above link.
If you are using vim, you probably shouldn't be using mouse at all. Yet, I sometimes find it convinient to quickly resize panes and windows with my mouse. It is good to know that vim has mouse support built in.
What's a plugin manager, without all the lovely plugins? As it turns out, some of the plugins can be almost essential for an efficient workflow.
Now that you've learnt the secrets of your editor, it is time to customize your own.
Happy VIMMING.

I am ambitious, intelligent, competitve (sometimes too much), loyal and brutally honest. People I respect the most are teachers, which is partially why I myself like to teach too. Apart from programming, I also like travelling, adventure sports and trying new food items. If you like a post, have a query, or just want to chit-chat, let me know here